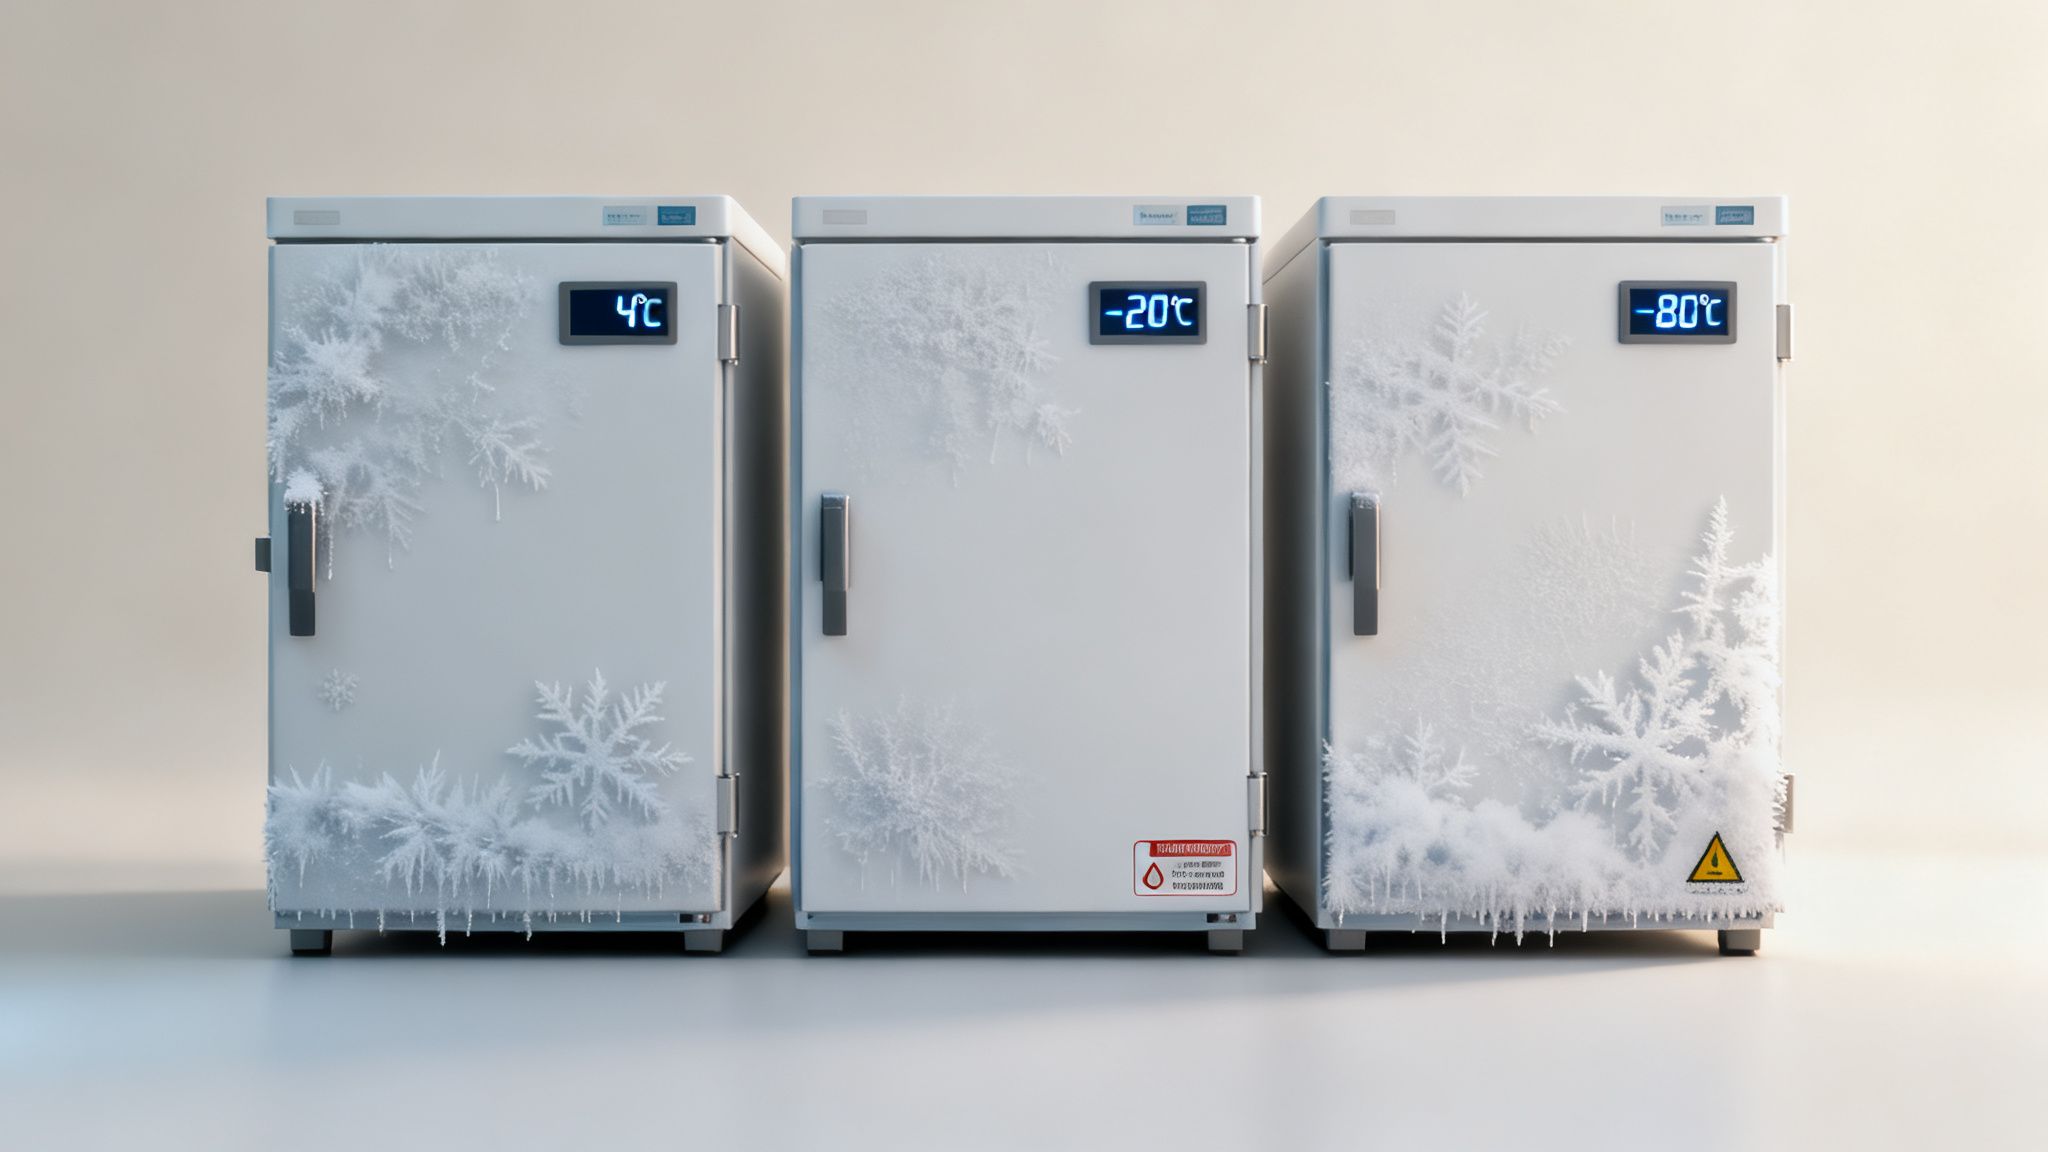
Once you’ve reconstituted your peptide, how you store it is everything. For quick access over the next few days, the refrigerator at around 4°C is your best bet. But for anything longer, you absolutely need to store it in a freezer at -20°C.
The single most important habit you can develop is to aliquot the solution into smaller, single-use portions before you freeze it. This simple step prevents the damaging freeze-thaw cycles that will wreck your peptide's potency and compromise your research.
Why Proper Peptide Storage Is a Non-Negotiable
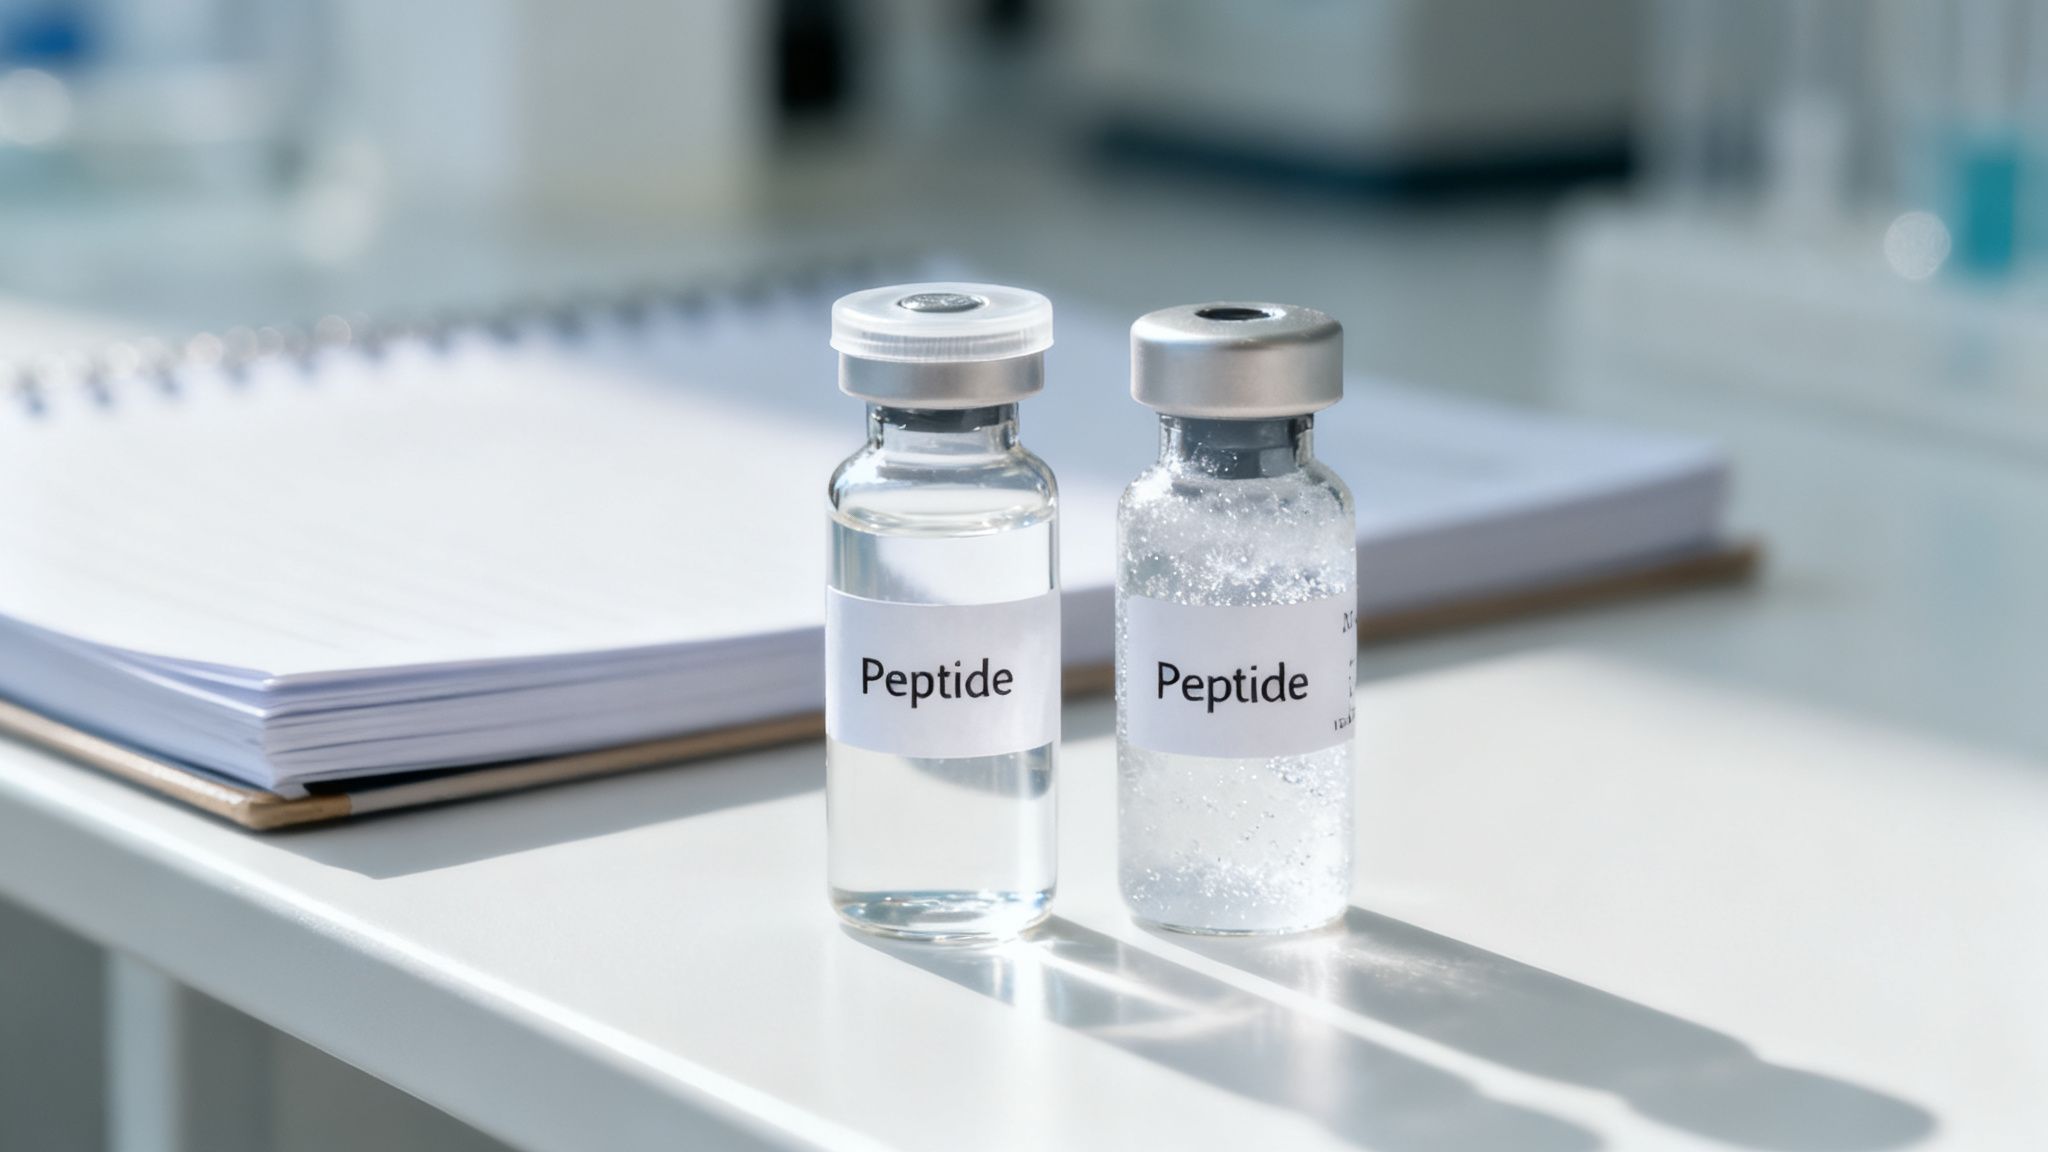
Let’s be honest—that 99%+ purity on the label is just the starting point. The real work begins the moment you add a solvent. From that point on, every decision you make determines whether your experiments yield reliable, repeatable data or just a pile of inconsistent results.
Think of your storage protocol as an insurance policy for your research. Seemingly small mistakes—a bit too much light, the wrong temperature, or sloppy handling—can quickly degrade even the most robust compounds. You invested in high-purity materials; now it's time to protect that investment.
The True Cost of Cutting Corners
A spoiled vial is more than just a financial loss; it’s a ripple effect that can derail an entire project. The obvious hit is to your budget, but the hidden costs are what really sting.
- Shot Research Integrity: When your peptide's potency is all over the map, you can't trust your data. Inconsistent results lead to flawed conclusions, and that's a hole you can't dig out of.
- Lost Time and Energy: Nothing is more demoralizing than having to repeat experiments because your key compound went bad. It’s a surefire way to kill momentum and burn through resources.
- Inaccurate Dosing: A degraded peptide means a lower effective concentration. This leads directly to underdosing and skewed outcomes, making it impossible to establish a reliable protocol.
A reconstituted peptide left at room temperature can lose up to 50% of its potency in a single week. Even in a 4°C fridge, stability is often capped at seven days, and that's assuming you do everything else right.
Not All Peptides Are Created Equal
Some peptides are just more fragile than others. If your sequence contains amino acids like Cysteine (C), Methionine (M), or Tryptophan (W), be extra cautious. These are notorious for being sensitive to oxidation and light, which is why the freeze-thaw cycle is their mortal enemy. You can find excellent peptide handling guidelines on sigmaaldrich.com that show how even small procedural changes can have a huge impact.
For anyone working with compounds from the Bullit Peptides catalog, from BPC-157 to sensitive growth hormone secretagogues, knowing these weak points is crucial. Each has a unique stability profile. Mastering peptide storage isn't just "good lab practice"—it's the only way to guarantee the last aliquot you use is just as potent as the first.
To dive deeper into this topic, check out our other articles on peptide stability.
Mastering Reconstitution for Maximum Stability
Before you can even think about long-term storage, you have to bring that lyophilized peptide powder back into solution. This first step—reconstitution—is everything. It sets the stage for the peptide's stability and effectiveness down the line. If you get this wrong, even the most perfect storage conditions won't save your experiment.
The goal here isn’t just to get the powder to dissolve. It's about protecting the peptide's delicate, complex structure. Think of it like handling a fragile piece of machinery; you can't just toss it around. Shaking the vial or using the wrong solvent can snap those intricate bonds, damaging your peptide before your research even gets off the ground.
Choosing Your Solvent Wisely
For most of the peptides you'll work with, the gold standard is Bacteriostatic Water (BAC Water). This isn't just regular sterile water. It's sterile water that contains 0.9% benzyl alcohol, which works as a preservative. That small addition is a game-changer because it prevents bacteria from growing inside the vial once it's been reconstituted, shielding your peptide from contamination.
Of course, sterile water is an option, but it offers no protection against microbial growth. It's fine if you're going to use the entire vial in one go, right away. But for any kind of storage, even for just a few days, BAC water is hands-down the better choice to keep things sterile.
Expert Tip: Don't even think about using tap water or standard distilled water. They’re full of minerals, impurities, and potential microbes that can react with your peptide and destroy it. Stick to the proper solvents.
The Art of Gentle Mixing
Once you have your solvent, your mixing technique is critical. The single biggest mistake I see people make is shaking the vial like a cocktail shaker, thinking it will dissolve faster. This is the fastest way to ruin a peptide. The force and agitation will shear the molecules apart, a process known as denaturation.
The right way requires a bit of patience.
- Start by slowly injecting the solvent down the side of the glass vial. Don't squirt it directly onto the powder.
- Let the liquid gently pool at the bottom.
- Now, just gently swirl the vial in a slow, circular motion. You can also roll it between your palms.
It might take a few minutes, but the peptide will dissolve completely. This gentle approach keeps the peptide chains intact and ready for your research. For a more detailed walkthrough, check out our complete guide on how to reconstitute peptides on BullitPeptides.com.
Calculating Concentration for Easy Dosing
A little bit of planning during reconstitution will make your life much easier later. I always recommend aiming for a simple concentration, like 1mg of peptide per 1mL of solvent. This 1:1 ratio makes calculating your doses incredibly straightforward.
For instance, if you have a 5mg vial of BPC-157, you'd add 5mL of BAC water to get that 1mg/mL concentration. For a 10mg vial, you'd add 10mL of BAC water. Doing this quick math upfront ensures every dose you pull is accurate and consistent, which is fundamental for getting reliable results. Nail this first step, and you’re well on your way to successful experiments.
Why Aliquoting Is Non-Negotiable for Peptide Potency
You’ve carefully reconstituted your peptide. Great. But what you do next is what separates successful experiments from wasted ones. The single biggest threat to your reconstituted peptide's stability is the repeated cycle of freezing and thawing.
Every time you pull that master vial from the freezer, let it warm up, draw what you need, and stick it back in, you’re chipping away at its potency. Think of it as a ticking clock on your research investment.
The solution? Aliquoting. It’s a simple but powerful lab technique where you divide the entire reconstituted solution into smaller, single-use portions. By doing this, you guarantee the last aliquot you use is just as powerful as the first. It’s the single most important thing you can do to protect your peptides.
Let’s Walk Through an Aliquoting Example
Imagine you're working with a 5mg vial of Ipamorelin. You've just reconstituted it with 2mL of bacteriostatic water, giving you a final concentration of 2.5mg/mL. Instead of just tossing that main vial back in the freezer, you’re going to aliquot it.
Let's say your protocol calls for 10 separate experiments. You'll need 10 individual aliquots. Here’s how you’d do it in the lab:
- Grab the Right Tubes: Get your hands on sterile, low-protein-binding microcentrifuge tubes. Standard plastic can actually leech peptides out of the solution, so this detail matters.
- Do the Quick Math: You have a total volume of 2mL (which is 2000µL). Divide that by your target of 10 aliquots, and you get 200µL per tube.
- Dispense with Precision: Using a sterile syringe or a calibrated micropipette, carefully transfer 200µL into each of the 10 tubes. Be consistent.
- Label Everything. No Excuses: This is critical for traceability. Immediately label each tube with "Ipamorelin," the concentration (2.5mg/mL), and the date you reconstituted it. Unlabeled tubes are useless tubes.
Just like that, you’ve turned one vulnerable master vial into 10 perfectly preserved, single-use aliquots ready for long-term storage.
This simple flowchart shows the prep work—reconstitution—that comes right before you start aliquoting.
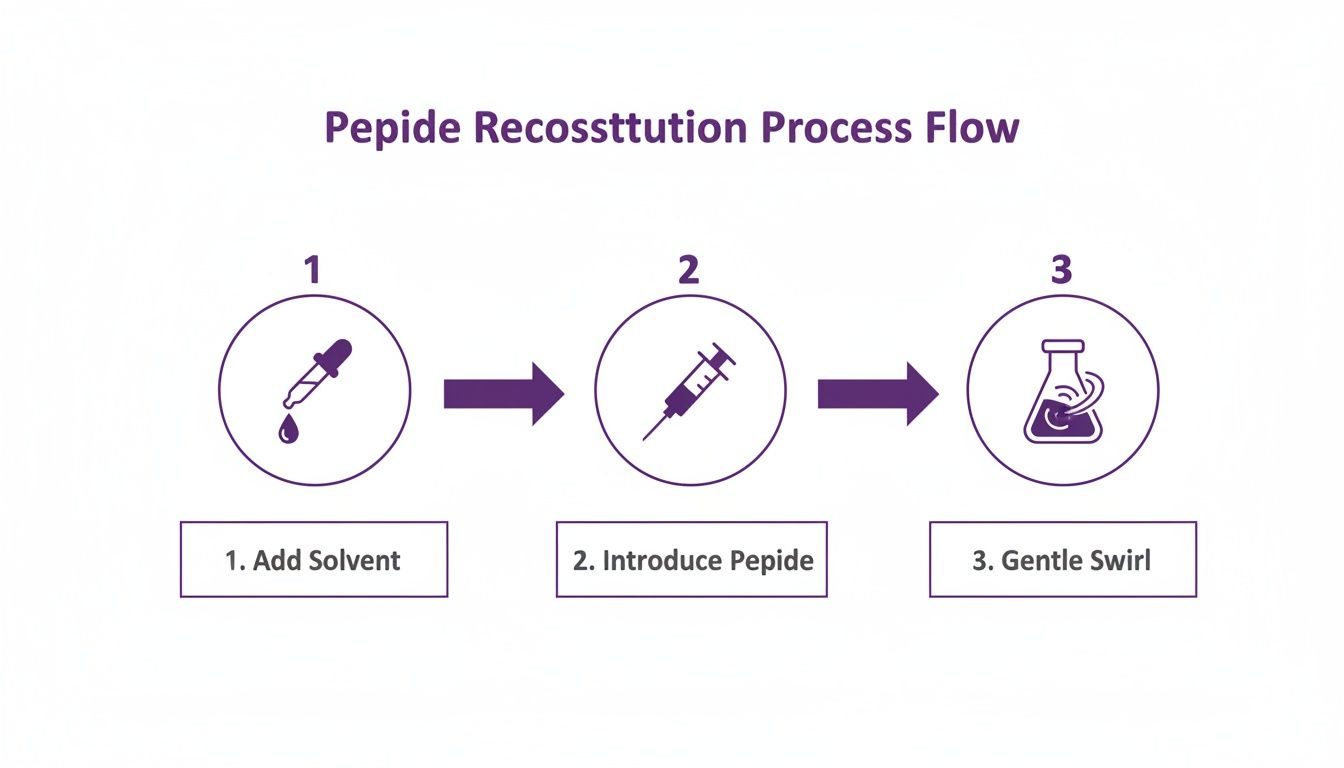
Think of reconstitution as setting the stage. Aliquoting is the main event for preserving your peptide's integrity.
To make this even more practical, here’s a quick cheatsheet for some of the most common peptides in our catalog.
Peptide Aliquoting Cheatsheet
| Peptide Name | Vial Size | Reconstitution Volume (BAC Water) | Final Concentration | Example Aliquot Volume | Number of Aliquots |
|---|---|---|---|---|---|
| BPC-157 | 5mg | 2.0 mL | 2.5 mg/mL | 200 µL | 10 |
| Ipamorelin | 5mg | 2.5 mL | 2.0 mg/mL | 250 µL | 10 |
| Tesamorelin | 2mg | 2.0 mL | 1.0 mg/mL | 200 µL | 10 |
| Melanotan II | 10mg | 2.0 mL | 5.0 mg/mL | 100 µL | 20 |
| CJC-1295 no DAC | 2mg | 1.0 mL | 2.0 mg/mL | 100 µL | 10 |
This table gives you a solid starting point for planning your own aliquoting strategy based on standard vial sizes and research needs.
The Science of Freeze-Thaw Damage
Ever wonder why that vial of Tesamorelin seemed to lose its punch after a few uses? You can almost always blame it on freeze-thaw cycles. Each cycle can slash peptide activity by a staggering 15-30%. Peptides with Cysteine or Methionine residues are especially vulnerable to this kind of oxidative damage.
This is why best practices, supported by institutions like the National Center for Biotechnology Information, dictate reconstituting to a concentration of 0.5-1 mg/mL and immediately aliquoting for storage at –20°C or colder.
What’s actually happening? As the solution freezes, ice crystals form. These act like microscopic shards of glass, physically shredding the peptide's delicate three-dimensional structure. When you thaw it, changes in pH and local solute concentration add even more stress. The damage is cumulative and irreversible.
Master the Art of Snap-Freezing
To fight back against those destructive ice crystals, you need to freeze your aliquots as fast as possible. This is called snap-freezing. The goal is to form smaller, less damaging ice crystals.
A standard lab freezer gets the job done, but you can do better.
Pro Tip from the Trenches: After you've prepped your aliquots, place the tube rack in the coldest part of your -20°C freezer—usually way in the back, far from the door where the temperature fluctuates. For highly sensitive peptides, some labs use dry ice or even liquid nitrogen to achieve an ultra-fast freeze, but a good lab freezer is more than enough for most compounds.
By making aliquoting and snap-freezing part of your standard workflow, you're not just storing peptides—you're actively preserving their biological activity. This level of care is what turns frustrating, inconsistent data into reliable, repeatable results.
Getting Peptide Storage Temperatures Right
You've done the hard work of reconstituting and aliquoting your peptides. Now for the final, and arguably most important, step: storing them correctly. This isn’t just a minor detail—it’s the single biggest factor that dictates how long your peptides remain potent and your research results stay consistent. Get it wrong, and you could render your entire batch useless in a shockingly short time.
The most common point of confusion I see is the difference between short-term refrigeration and long-term freezing. A standard lab fridge, typically holding at 4°C (39°F), is nothing more than a temporary holding zone. It's only suitable for the specific aliquot you plan to use within the next day or two.
Make no mistake: storing a peptide solution at 4°C slows down degradation, but it absolutely does not stop it. For anything longer than a few days, freezing isn’t just a good idea—it’s mandatory.
Refrigerator vs. Freezer: The Stability Showdown
The leap from a refrigerator to a freezer is a massive one for peptide preservation. A standard lab freezer chills to about –20°C (–4°F), a temperature where the biochemical reactions that chew up peptide bonds slow to a crawl. This simple change dramatically extends a solution's viability from just a few days to several months.
For the majority of peptides in the Bullit Peptides catalog, a –20°C freezer is the reliable workhorse you’ll need. But when you’re dealing with highly sensitive or extremely valuable peptides, the gold standard is a deep freezer. These units plunge temperatures down to an ultra-low –80°C (–112°F), effectively slamming the brakes on nearly all degradation processes for years on end.
The difference is stark. Storing a reconstituted peptide at 4°C can slash its half-life from months to mere days. Freezing is the only way to lock in that initial potency for your future experiments.
The data backs this up. Peptide specialists have shown that while a lyophilized peptide can maintain 98-100% purity for up to two years at –80°C, a reconstituted one can see its activity plummet to 60-70% if left in a solution for more than a few weeks without proper freezing. You can discover more insights about peptide storage on JPT.com to see just how critical these temperature differences are.
The Hidden Danger of Frost-Free Freezers
Here’s a piece of hard-won advice that can save you a world of trouble: never use a "frost-free" freezer for long-term peptide storage. I know it sounds counterintuitive, but the very feature that makes them so convenient for your kitchen makes them an absolute disaster for sensitive lab reagents.
Frost-free freezers work by periodically running a gentle heating cycle to melt away ice buildup. These automatic defrost cycles create subtle but significant temperature fluctuations. For your peptides, this is a slow-motion version of the exact freeze-thaw damage you worked so hard to avoid by aliquoting in the first place.
Over weeks and months, these repeated thermal shifts will quietly degrade your peptide's structure and chip away at its biological activity.
Best Practices for Freezer Storage
To keep your peptides as stable as the day you reconstituted them, stick to these simple but non-negotiable rules for freezer storage.
- Go Manual: Whenever you have the choice, use a freezer that requires manual defrosting. This guarantees a consistent, stable, and uninterrupted cold environment.
- Store in the Back, Never the Door: The freezer door is the absolute worst place for your samples. It experiences wild temperature swings every time it’s opened. Always place your storage box in the back of the freezer, where the temperature is most stable.
- Box It Up: Keep all your aliquots organized in a clearly labeled, sealed freezer box. This not only prevents them from getting lost in the icy depths but also adds another layer of insulation against those brief temperature changes when you open the freezer to grab something else.
By understanding the nuances of temperature and knowing the hidden risks of certain lab equipment, you can take full control over your peptide's stability. It’s this level of meticulous care that ensures every single aliquot delivers the reliable, high-potency performance your research demands.
Common Peptide Storage Mistakes to Avoid
Knowing the right way to store reconstituted peptides is only half the battle. What’s just as critical is knowing what not to do.
I've seen it happen countless times—carefully planned research gets completely derailed by a few common, yet easily avoidable, storage mistakes. Think of this as your essential troubleshooting guide, a checklist built from experience to protect your investment and ensure your results are always accurate.
Learning from others' mistakes is far less painful (and expensive) than making them yourself. Many researchers stumble by overlooking simple things like light, air exposure, or pH. These factors can silently sabotage a peptide's integrity. By seeing these pitfalls ahead of time, you can sidestep the frustration and keep your work on track.
Leaving Your Peptides Exposed to Light
One of the most underestimated threats to peptide stability is plain old light. It might seem harmless to leave a vial on the lab bench for a few hours, but for certain peptides, it’s a recipe for disaster.
This isn't a minor issue. It's a major cause of degradation.
Peptides containing specific amino acids, particularly Tryptophan (Trp) or Methionine (Met), are highly susceptible to what’s called photodegradation. When exposed to light—especially UV rays from sunlight or even some overhead lab lighting—these amino acids can undergo chemical changes. This alters the peptide's structure and, you guessed it, renders it biologically inactive. It's a silent killer of potency.
Luckily, the fix is surprisingly simple.
- Use Amber Vials: Whenever possible, store your peptides in amber-colored vials. They’re specifically designed to block out harmful UV light.
- Wrap It Up: If you only have clear vials, don't sweat it. A quick and easy workaround is to wrap the vial tightly in a small piece of aluminum foil. This creates a light-proof barrier that works just as well.
This simple habit is a pro move that pays huge dividends in preserving your peptide's effectiveness.
The Problem with Air Exposure and Oxidation
Another critical mistake is failing to properly seal vials after use. Every time you leave a cap loose or a stopper ajar, you’re basically inviting oxygen in to wreak havoc. Oxidation is a chemical process that can irreversibly damage your peptides, especially those with Cysteine (Cys) or Methionine (Met) residues.
Think of it like an apple turning brown after you cut it—that same process is happening to your peptide at a molecular level. The damage accumulates over time, leading to a gradual but certain loss of potency.
Always ensure your vial stoppers are secure and caps are tightly sealed the moment you're done drawing from it. This tiny action minimizes oxygen exposure and is one of the easiest ways to extend the functional life of your reconstituted peptide.
For peptides that are exceptionally sensitive, some advanced labs even purge the vial with an inert gas like argon or nitrogen before sealing it. While that's overkill for most common peptides, it highlights just how serious the threat of oxidation can be. If you're working with a blend like the CJC-1295 Ipamorelin combination, which contains multiple delicate sequences, taking every precaution is just smart science.
Using the Wrong pH or an Unbuffered Solution
Finally, let’s talk about the chemical environment. While Bacteriostatic Water is the go-to for most peptides, some have very specific pH requirements for stability. Dissolving a peptide in a solution with the wrong pH can cause it to precipitate (or "crash") out of the solution, or worse, to hydrolyze and break down entirely.
If a peptide’s data sheet specifies a certain pH range or recommends a particular buffer—like an acetate or phosphate buffer—it’s not a suggestion. It’s a requirement. Ignoring this guidance is a fast track to a useless vial. The pH directly influences the peptide's charge and shape, which are essential for its biological activity.
Avoiding these common blunders isn't about being paranoid; it's about being professional. By controlling for light, air, and the chemical environment, you ensure that the peptide you use in your final experiment is the same as the one you started with. That consistency is the foundation of all reliable research.
Your Top Peptide Storage Questions, Answered
Working with peptides means you're dealing with delicate molecules. Get the storage right, and your research can proceed smoothly. Get it wrong, and you're left with degraded materials and questionable results. I've seen it happen time and again.
To help you avoid the common pitfalls, I've put together answers to the most frequent and critical questions we get from researchers. These aren't just textbook answers; this is practical advice straight from the lab bench, designed to keep your peptides potent and your experiments on track.
Can I Pre-Load Syringes and Store Them in the Fridge?
I get why this is tempting—it seems like a great way to save time. But I have to be blunt: pre-loading syringes is a terrible idea. It's probably one of the most common mistakes I see, and it will absolutely ruin your peptide.
The problem starts with the plastic. Over time, your peptide solution will start interacting with the syringe barrel and stopper. The peptide can literally stick to the plastic surface, which means the dose you think you're using is no longer accurate. You're effectively lowering the concentration without even realizing it.
Then there's the issue of the needle itself. That tiny, enclosed space is a perfect spot for the solution to clog up as it sits. If you were even thinking of freezing it (please don't), the ice crystals forming inside that narrow channel would shred the peptide's delicate structure.
Here's the professional standard: Always store your aliquots in sterile, sealed, low-protein-binding microcentrifuge tubes. When it's time for your in-vitro application, draw up your dose into a fresh syringe right then and there. It's a simple discipline that guarantees you're working with a stable and pure compound every single time.
What Are the Signs My Reconstituted Peptide Has Degraded?
Spotting a degraded peptide can be tough, as the most damaging changes are often invisible. But there are definitely some tell-tale visual cues that should set off alarm bells.
If you see any of the following in your vial, it’s compromised. Don't risk it—discard it immediately:
- Cloudiness or Murkiness: A good peptide solution should be crystal clear. Any haze means the peptide might be clumping together (aggregating), falling out of solution, or worse, you've got bacterial contamination.
- Color Change: Unless you're working with a peptide known to have a specific color, your solution should be colorless. Any new tint or hue is a dead giveaway that chemical degradation is happening.
- Visible Particles: See any floaters, sediment, or little specks after a gentle swirl? The solution is no longer viable.
Honestly, the most reliable sign of degradation isn't something you see, but something you measure in your results. If you suddenly see a drop in efficacy or inconsistent outcomes compared to earlier work from the same vial, invisible degradation is almost certainly the culprit. This is precisely why being proactive and militant about your storage protocol is non-negotiable.
How Long Does Lyophilized Peptide Powder Last Before Mixing?
This is the good news. Unopened, lyophilized (freeze-dried) peptide powder is incredibly robust. This is exactly why it's shipped and stored this way—it's built for the long haul.
For maximum shelf life, keep the sealed, unopened vial in a freezer at –20°C (–4°F) or colder. Tucked away like this, the powder will remain stable and potent for several years. The combination of ultra-low temperature and zero moisture essentially presses pause on any degradation process.
Don't have a –20°C freezer? You can still get by. Storing the lyophilized powder in a standard refrigerator around 4°C (39°F) will keep it in good shape for many months. The golden rules are to keep the vial sealed, dry, and protected from light until the very moment you're ready to reconstitute it. The second you break that seal, you introduce moisture and air, and the stability clock starts ticking.
Does It Matter Where in the Freezer I Store My Peptides?
Yes. A thousand times, yes. Just tossing your peptides anywhere in the freezer is a rookie mistake that can cost you dearly. Where you place your aliquots has a huge impact on their long-term stability.
Whatever you do, never, ever store your peptides in the freezer door. The door is slammed with warm air every time it's opened, causing wild temperature swings. This constant fluctuation is the arch-nemesis of peptide stability, effectively creating the very freeze-thaw cycles you're trying so hard to avoid.
For the most stable environment possible, this is how the pros do it:
- Put all your carefully labeled aliquots into a dedicated, sealed freezer box.
- Place that box in the very back of the freezer, as far from the door as you can get.
- Make sure it’s not sitting near any auto-defrost heating elements, which create their own little pockets of temperature chaos.
This isn't being overly cautious; it's smart science. This simple habit creates a stable, consistently cold micro-environment that gives your peptides the best possible protection against the slow, silent degradation that can sabotage your research.
At Bullit Peptides, our commitment is twofold: providing researchers with the highest-purity compounds and sharing the knowledge to use them successfully. When your experiments are built on a foundation of quality and reliability, great work happens. Explore our catalog of third-party tested, research-grade peptides at https://bullitpeptides.com to learn more.