Reconstituting a peptide is the first—and arguably most crucial—step in any research project. It’s the process of taking that freeze-dried (lyophilized) powder and carefully dissolving it into the right liquid solvent, turning it into a stable, active, and accurately concentrated solution ready for your experiments.
Your Blueprint for Perfect Peptide Reconstitution
Welcome to your definitive guide for preparing lyophilized peptides. Honestly, getting this part right from the start can make or break your entire study. A simple misstep here—like choosing the wrong solvent or shaking the vial too hard—can lead to peptide degradation, clumping, or inaccurate concentrations. All of that means your results could be compromised before you even begin.
Think of this section as your launchpad. We'll cover everything from picking the right solvent to long-term storage, ensuring your work is built on a solid foundation.

Core Principles of Peptide Handling
The methods we use today didn't just appear out of nowhere. They're built on foundational research from the 1980s when scientists were first digging into signal peptide sequences to figure out how proteins behave. Those early studies showed how things like charged ends and hydrophobic sections determine how a peptide interacts with different liquids. This is why a one-size-fits-all approach just doesn't work.
Success really boils down to a few key principles that every researcher should live by:
- Aseptic Technique: This is non-negotiable. Keeping everything sterile prevents microbial contamination, which can chew up your peptide or skew your results.
- Solvent Compatibility: The peptide's amino acid sequence is like a chemical fingerprint that dictates the best solvent. A mismatch can leave you with a useless, insoluble clump.
- Gentle Handling: Remember, peptides are delicate. Never shake them vigorously. A gentle swirl or roll is all you need to get them into solution without destroying their structure.
An At-a-Glance Reference
Consider this your quick-start guide, setting the stage for the detailed, step-by-step protocols we’ll get into next. For deeper dives into specific research topics, our comprehensive Research Peptide Blog is always available at https://bullitpeptides.com/research-peptide-blog/.
To make things even easier, I've put together a quick reference table. It’s designed to help you quickly match the characteristics of your peptide with the most suitable solvents.
Quick Reference for Reconstitution Solvents
| Peptide Characteristic | Primary Recommended Solvent | Alternative Solvents | Key Consideration |
|---|---|---|---|
| Basic (Net Positive Charge) | Sterile Water | 10%-25% Acetic Acid | Start with water; if solubility is an issue, acid helps. |
| Acidic (Net Negative Charge) | Sterile Water | Ammonium Bicarbonate (1%) | Basic buffers can improve solubility for acidic peptides. |
| Hydrophobic (High % of NP AAs) | DMSO or DMF | Isopropanol, Acetonitrile | Use the smallest amount of organic solvent possible, then dilute. |
| Cysteine-Containing | Degassed, Oxygen-Free Water | Acetonitrile/Water Mix | Oxygen can cause disulfide bonds to form, leading to dimerization. |
This table should give you a solid starting point for most common situations you'll encounter in the lab.
Key Takeaway: Proper reconstitution isn't just about dissolving powder in water. It's a precise scientific technique that safeguards the peptide's integrity, ensures accurate dosing, and lays the groundwork for reliable, reproducible results. Every single detail, from how you clean your workspace to the solvent you choose, directly impacts the quality of your research.
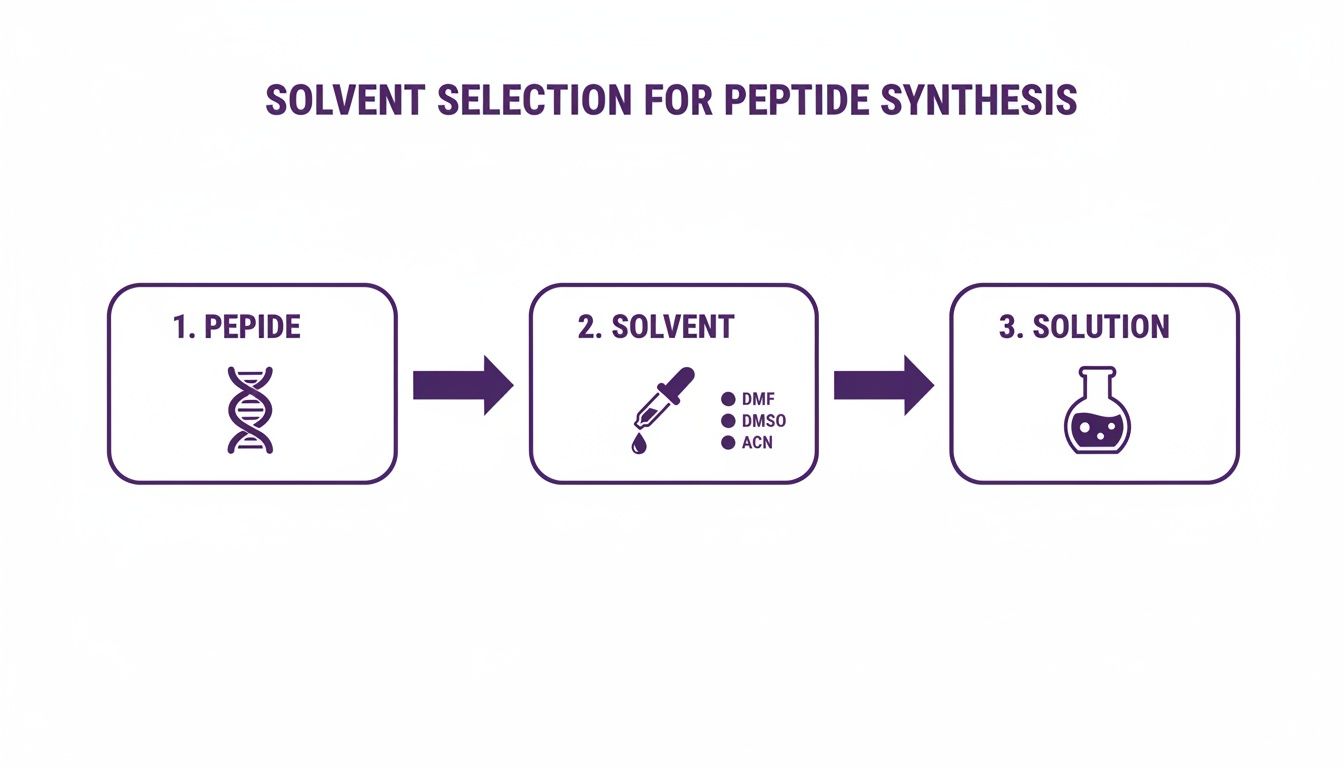
Choosing the Right Solvent for Your Peptide
Picking the right solvent for your peptide isn't just a matter of convenience; it's a critical decision driven by the peptide's unique amino acid sequence. The chemical personality of the peptide—its charge, its polarity—is what dictates which liquid will get it into solution without wrecking it. Nail this step, and you're setting your experiment up for success. A bad choice, on the other hand, can lead to clumps and aggregates, turning your valuable research material into useless gunk.
The first thing you need to do is get to know your peptide. Is it basic, acidic, or neutral? Does it love water (hydrophilic) or hate it (hydrophobic)? The answers will point you straight to the right solvent, ensuring your peptide is stable and ready for action.
Your Go-To Solvent: Sterile or Bacteriostatic Water
For the lion's share of research peptides you'll encounter, high-purity water is the best place to start. If your peptide is basic, meaning it carries a net positive charge, it will almost always dissolve nicely in water. This is because it’s packed with basic amino acids like Arginine (Arg), Lysine (Lys), and Histidine (His).
BPC-157 is a perfect real-world example. Its sequence gives it a slightly basic character, so it dissolves beautifully in a sterile aqueous solution. If you're working with multi-use vials, bacteriostatic water is the smarter choice. It contains 0.9% benzyl alcohol, which acts as a preservative to stop anything from growing in your solution, keeping it viable for up to 28 days in the fridge. For single-use or immediate applications, regular sterile water works just fine. You can find high-quality reconstitution water for your research needs right in our store.
When Water Isn't Cutting It: Acetic Acid Solutions
So what happens when you’ve added water to a basic peptide and it just sits there, cloudy and stubborn? This is a classic sign that the peptide needs a more acidic environment to fully dissolve. Don't toss the vial—a simple tweak can save your sample.
This is where a dilute solution of acetic acid (usually 10% to 25%) comes to the rescue. The lower pH helps protonate the peptide, ramping up its net positive charge and making it much more friendly with the water molecules.
Here’s the practical way to handle it:
- Start with sterile water. Always give water the first shot.
- Add acid if needed. If it’s not dissolving completely, add a small drop of dilute acetic acid.
- Mix gently. Swirl the vial—don't shake it!—until the solution turns clear.
This technique is a lifesaver for peptides that are right on the edge of solubility. It gives them the little chemical nudge they need to get into solution without any harsh treatment.
Tackling Hydrophobic Peptides with Organic Solvents
The real headaches in reconstitution are the hydrophobic peptides. These molecules are loaded with nonpolar amino acids like Leucine (Leu), Valine (Val), and Isoleucine (Ile). Their "oily" nature means they actively repel water, making aqueous solvents completely useless.
For these tough cases, you have to bring out the organic solvents. The most common players in the lab are:
- Dimethyl sulfoxide (DMSO)
- Dimethylformamide (DMF)
- Acetonitrile (ACN)
The trick here is to be strategic. You want to use the absolute minimum amount of the organic solvent needed to get the lyophilized powder to dissolve. Once it's in an organic solution, you can then very slowly add your aqueous buffer (like sterile water) to get to your final target concentration.
A Critical Safety Note: Organic solvents like DMSO can be toxic to cells, even at low concentrations. If the final concentration of DMSO in your cell culture or assay gets above 0.1%, it can kill your cells or completely skew your results. Always be meticulous with your dilution math. For instance, if you dissolve 5 mg of a peptide in 100 microliters of DMSO, you must dilute that stock at least 1:1000 in your final experimental medium to stay in the safe zone. This careful approach protects both your peptide and the integrity of your data.
A Practical Walkthrough of the Reconstitution Process
Once you’ve nailed down the right solvent, it’s time to get your hands dirty. This is where theory meets the lab bench, and your technique will make or break the quality of your final peptide solution. Getting this part right is crucial for sterile, accurately concentrated results that you can trust in your research.
We'll cover everything from prepping your workspace to the gentle art of mixing and the final, critical inspection. Think of this process as your first line of defense against contamination, peptide degradation, and inaccurate dosing.
Setting the Stage: Workspace and Materials
Before a single vial is opened, your workspace needs to be impeccable. In this game, contamination is the fastest way to ruin your research, so taking a few minutes to prep properly is non-negotiable.
- Sanitize Everything: Give your workspace a thorough wipe-down with a good disinfectant. If you’re lucky enough to have a laminar flow hood, this is the perfect time to use it.
- Gather Your Gear: Lay out all your tools so they're within easy reach: the lyophilized peptide vial, your chosen solvent (like bacteriostatic water), sterile syringes for measuring, and plenty of alcohol swabs.
- Let Things Warm Up: This is a step people often skip. You need to let both the lyophilized peptide and the solvent come to room temperature. Why? Opening a cold vial invites condensation from the air, and that moisture is a stability killer. Just let them sit on the bench for a good 20-30 minutes.
With everything at room temp, grab an alcohol swab and clean the rubber stoppers on both the peptide and solvent vials. Let them air dry completely—don’t blow on them!—to ensure a sterile surface before you insert a needle.
A Quick Word of Caution: Never, ever try to speed up the warming process. I’ve seen people use warm water baths or other heat sources, and it’s a great way to denature the delicate peptide structure before you even start. Patience is part of good lab practice.
The Gentle Art of Reconstitution
Now for the main event: adding the solvent. You have to remember that peptides are essentially fragile chains of amino acids. If you handle them too aggressively, you can physically shear those chains, rendering your expensive research compound useless.
The number one rule here is never shake the vial. Shaking creates mechanical stress and can cause the peptide to aggregate, forming insoluble clumps that won’t do you any good. We're going for a much more delicate approach.
First, pull up the exact amount of solvent you calculated into a sterile syringe. Let's say you have a 5mg vial of CJC-1295 and you’re aiming for a 2mg/mL concentration. Your math would be 5 mg / 2 mg/mL, meaning you need 2.5 mL of bacteriostatic water.
Next, carefully push the needle through the center of the rubber stopper. Here's a pro tip: angle the needle so the tip is against the inside wall of the vial. Now, slowly depress the plunger and let the solvent trickle down the side of the glass. This simple technique stops the solution from foaming and prevents you from directly blasting the powder, which can make it clump up.
This little diagram sums it up nicely—it’s a simple path from a solid powder to a solution you can actually use.
It really drives home the point that moving from a stable, lyophilized peptide to a functional solution hinges on picking the right solvent and using the right technique.
Ensuring a Complete and Safe Dissolution
After you’ve added the solvent, you need to encourage the peptide to dissolve. The best way is to gently swirl the vial in slow circles or roll it between your palms. Some peptides will dissolve almost instantly, while others are a bit more stubborn and might take a few minutes. Again, patience is your friend.
Peptide research has come a long way, and so have the methods for getting them into solution. Beyond this basic vial technique, you might run into more advanced lab methods like 'in-gel,' 'on-column,' or 'on-bead' reconstitution, each designed for specific needs. The 'on-bead' method, for instance, is a slick way to handle large-scale work by combining purification, detergent removal, and peptide recovery into one streamlined process. If you're interested in the nitty-gritty of how these reconstitution techniques have evolved, it's a fascinating read on improving lab efficiency.
For most day-to-day research, though, the direct-to-vial method we're talking about is the gold standard. Once you’ve finished mixing, just let the vial sit for a few more minutes to ensure everything is fully dissolved.
Your final step is a quick visual inspection. Hold the vial up to a light source and check for any floaters, undissolved particles, or general cloudiness. A perfectly reconstituted peptide solution should be crystal clear. If it’s hazy or has bits floating in it, you’ve likely got a solubility problem or, worse, a degraded peptide. Don't use it. This final check is your last quality control gate before you either store the peptide or use it in your experiment.
Mastering Peptide Concentration and Dosing Calculations
Getting the math right is the bedrock of good research. Once you have a perfectly clear peptide solution, the next make-or-break step is knowing its exact concentration and how to pull the precise dose your protocol calls for. This is where a lot of people get tripped up, but the calculations are actually quite simple once you get the hang of it.
Nailing this part isn't just about avoiding waste; it's about ensuring your data is valid and reproducible. The whole process really breaks down into two parts: first, figuring out how much solvent to add to get the concentration you want, and second, calculating how much of that solution to draw for a specific dose.
The Universal Formula for Reconstitution
Every calculation you'll do comes back to one core relationship. Think of it as your North Star for reconstituting peptides with precision every single time.
The basic formula is: Concentration = Mass of Peptide / Volume of Solvent
From there, we can easily flip it around to solve for the thing you'll calculate most often—the amount of solvent you need to add.
Volume of Solvent = Mass of Peptide / Desired Concentration
Just make sure your units are consistent. We're usually working with:
- Mass of Peptide in milligrams (mg)
- Desired Concentration in milligrams per milliliter (mg/mL)
- Volume of Solvent calculated in milliliters (mL)
Let's run through a quick, practical example. Say you have a 5 mg vial of Tesamorelin and you want a final concentration of 2 mg/mL. The math is straightforward:
Volume of Solvent = 5 mg / 2 mg/mL = 2.5 mL
That's it. You just need to add exactly 2.5 mL of bacteriostatic water to your vial to hit that target.
From Concentration to Dosing
With your stock solution mixed, the next task is figuring out how much to draw for a specific dose, which is often measured in micrograms (mcg). The most important thing to remember here is the conversion: 1 mg = 1000 mcg. Forgetting this simple conversion is a common source of error.
Let's stick with our Tesamorelin example. We now have a solution that's 2 mg/mL. That's the same as 2000 mcg/mL.
If your protocol requires a 500 mcg dose, the calculation looks like this:
Volume to Draw = Desired Dose (mcg) / Concentration (mcg/mL)
Volume to Draw = 500 mcg / 2000 mcg/mL = 0.25 mL
So, you would carefully draw 0.25 mL of your solution to get a perfect 500 mcg dose.
Pro Tip: I always recommend using a standard 1 mL (100-unit) insulin syringe for this. It makes measuring so much easier. Since 1 mL is the same as 100 units on the syringe, our 0.25 mL dose is simply 25 units. It’s a very intuitive way to measure accurately.
Quick Reference Calculation Table
To help cut down on mistakes and save you time at the bench, a quick reference chart is incredibly useful. I've put together some common scenarios below to show how much solvent is needed for different vial sizes and concentrations.
Reconstitution Calculation Examples
This table provides worked-out examples for some of the most common peptide vial sizes and target concentrations you're likely to encounter.
| Peptide Mass in Vial | Desired Concentration | Formula (Mass / Concentration) | Required Solvent Volume |
|---|---|---|---|
| 2 mg | 1 mg/mL | 2 mg / 1 mg/mL | 2 mL |
| 5 mg | 2 mg/mL | 5 mg / 2 mg/mL | 2.5 mL |
| 5 mg | 5 mg/mL | 5 mg / 5 mg/mL | 1 mL |
| 10 mg | 2 mg/mL | 10 mg / 2 mg/mL | 5 mL |
| 10 mg | 5 mg/mL | 10 mg / 5 mg/mL | 2 mL |
Once you get comfortable with these simple calculations, you'll gain the confidence that every dose you prepare is accurate and consistent. It's always a good habit to double-check your math before adding any solvent.
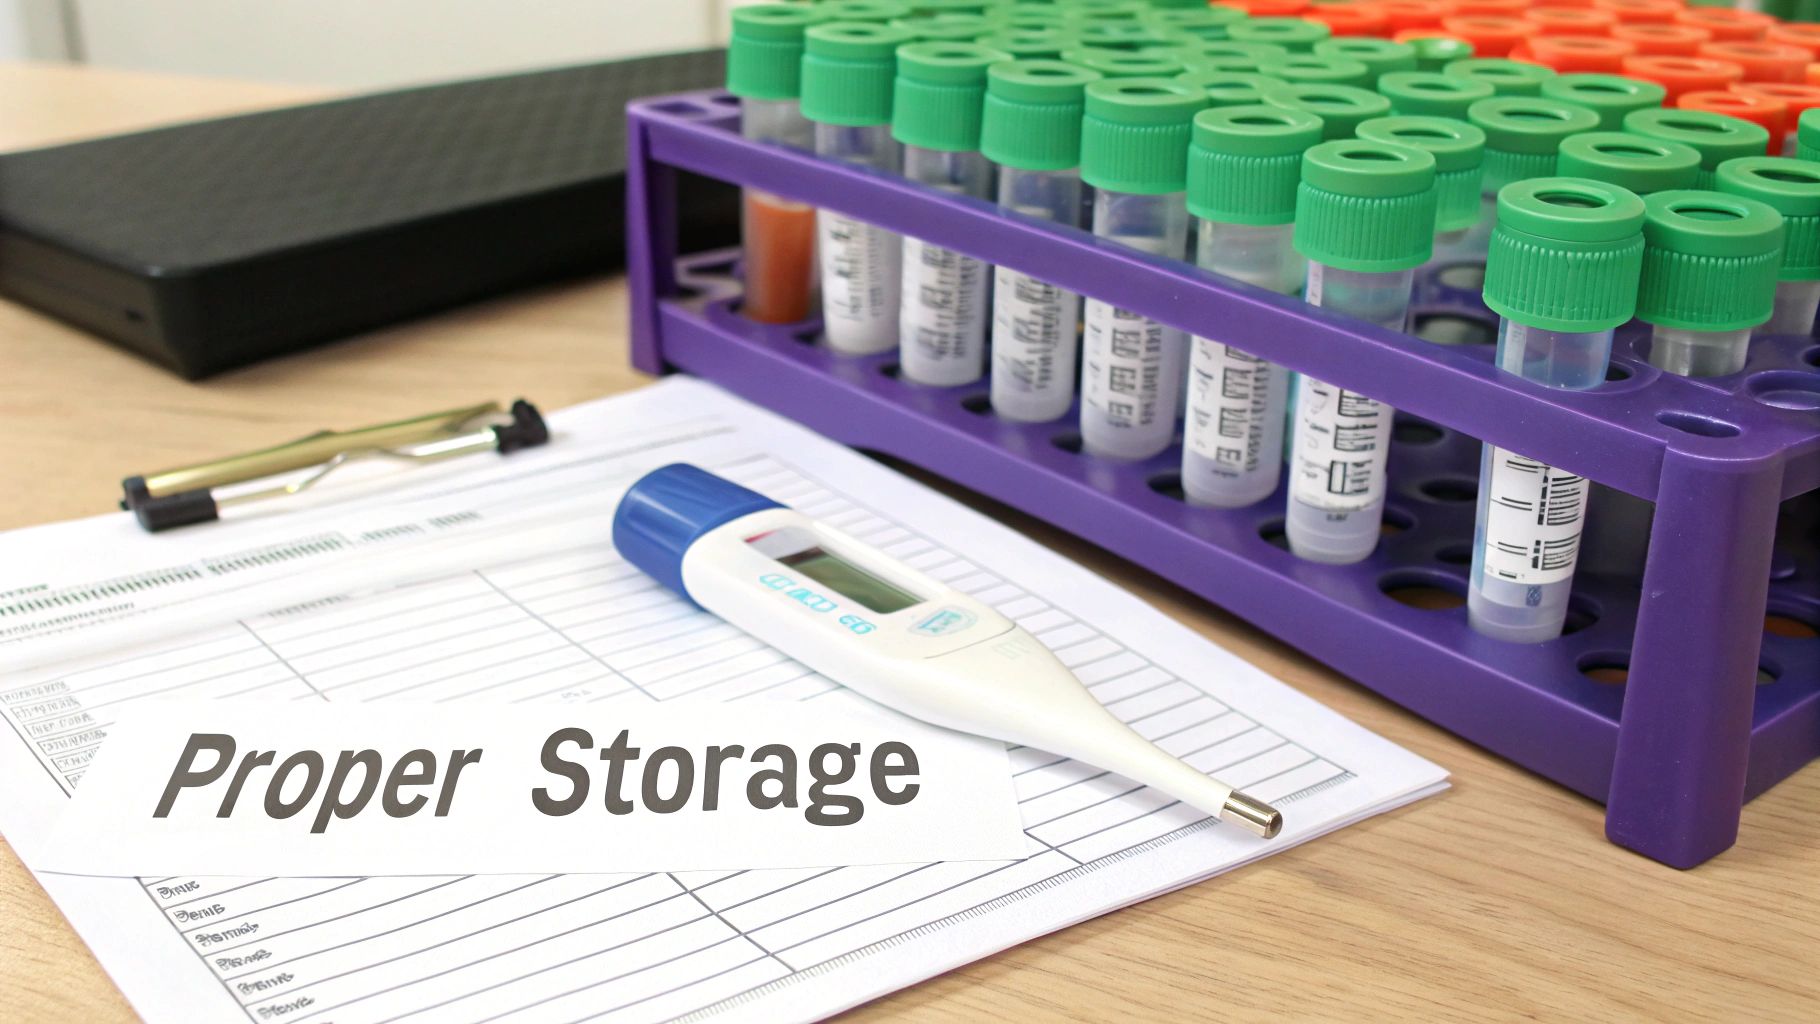
Storing and Handling Peptides for Long-Term Stability
You’ve done the hard work of reconstituting your peptide—that's a huge win. But keeping that peptide stable and potent for your experiments? That's a whole different ball game. The reality is, while lyophilized peptides are impressively tough, their shelf life tanks the moment they hit a solvent.
Getting the storage right protects your investment and, more importantly, the validity of your research. A simple mistake here can silently kill your experiment before it even starts, leading to inconsistent results and frustrating troubleshooting sessions.
Guidelines for Lyophilized Peptide Storage
Before you even uncap that vial, let's talk about where it should live. These freeze-dried powders are pretty resilient, but they have their weaknesses—namely heat, moisture, and light.
To get the maximum shelf life, which can be months or even years, you need to follow a few simple rules:
- Keep It Cold: For long-term storage, your freezer is its best friend. Aim for -20°C. If you plan to use it within a few weeks, a standard refrigerator (2-8°C) will do the job.
- Keep It Dry: Always make sure the vial's cap is on tight. Lyophilized powder is hygroscopic, meaning it greedily pulls moisture from the air, which is a fast track to degradation.
- Keep It Dark: Light, especially UV, is notorious for breaking delicate peptide bonds. Storing the vials in the box they came in, or any dark container, is an easy and effective way to protect them.
Best Practices for Reconstituted Solutions
Once your peptide is in liquid form, it's a completely different story. It’s far more fragile. That stability window shrinks from months or years down to just a few weeks. For any reconstituted solution, storing it in the fridge at 2-8°C is non-negotiable. Don't ever leave it sitting on the bench at room temperature for an extended time.
The problem of keeping peptides stable is nothing new. While the therapeutic peptide field blew up after insulin was introduced in the 1920s, it hit a major roadblock in the 1980s due to poor stability and high production costs. Today, researchers and suppliers like Bullit Peptides are still wrestling with the same core issue: preserving bioactivity. You can get some great perspective by reading about the historical challenges in peptide development.
The absolute worst thing you can do to a stored peptide solution is to repeatedly freeze and thaw it. Each time you do this, ice crystals form that physically shred the peptide's structure—a process called cryo-fragmentation. This damage is permanent and will completely ruin your sample's potency.
Key Insight: Avoid freeze-thaw cycles like the plague. A peptide that has been frozen and thawed multiple times is unreliable for research. The damage builds up with each cycle and is often impossible to spot just by looking at the solution.
The Power of Aliquoting
So, how do you get around this destructive cycle? The answer is simple and elegant: aliquoting.
Aliquoting is just the practice of splitting your main stock solution into smaller, single-use portions right after you reconstitute it. So instead of one big 2 mL vial that you keep going back to, you’d create ten 200 µL vials.
This isn't just a suggestion; it’s standard practice in any serious lab for a few good reasons:
- It Preserves the Master Stock: You only ever thaw the exact amount you need for a single experiment. The rest of your supply stays safely frozen and pristine.
- It Prevents Contamination: Every time you poke a needle through a vial's septum, you're rolling the dice on contamination. Aliquoting dramatically reduces how often you have to do that.
- It Ensures Consistency: You can be confident that aliquot #10 is just as potent as aliquot #1. This is the key to getting reproducible results from one experiment to the next.
Taking a few extra minutes to aliquot your stock solution will safeguard your entire peptide supply, saving you a world of time, money, and frustration down the road.
Troubleshooting Common Reconstitution Issues
Even when you follow a protocol to the letter, things can go sideways. It happens to everyone. Knowing how to troubleshoot a stubborn reconstitution is a skill that separates the pros from the novices, and it can be the difference between a successful experiment and a frustrating dead end.
The most common headache? The peptide just won't dissolve. You’re left with a cloudy mixture or little specks of white powder mocking you from the bottom of the vial. This is almost always a sign that your peptide and your chosen solvent aren't getting along.
My Peptide Won’t Fully Dissolve
Before you throw in the towel and declare the peptide a dud, let's try a little gentle persuasion. These techniques are designed to coax the peptide into solution without damaging its structure.
- Gentle Warming: Sometimes, a little warmth is all it takes. Try holding the vial between your palms for a few minutes. If that doesn't work, a controlled water bath—never exceeding 40°C—can provide the slight energy boost needed to get things moving.
- Sonication: This is my go-to trick for stubborn peptides. A quick, 1-2 minute burst in an ultrasonic water bath works wonders. The high-frequency waves break up aggregates far more effectively and gently than aggressive vortexing ever could.
If you’ve tried these methods and are still looking at a cloudy mess, it's a clear signal to rethink your solvent. For instance, if you have a basic peptide that's sulking in bacteriostatic water, adding a tiny drop of dilute acetic acid can often clarify the solution in seconds. It's like magic.
Expert Tip: If you find yourself repeatedly battling the same type of peptide, it’s a good sign you need to dig a little deeper. Our extensive guides on peptide research cover advanced handling techniques for a wide variety of challenging compounds.
What if I Suspect Contamination or Degradation?
Pay close attention to what your solution looks like. A properly reconstituted peptide should be crystal clear and colorless.
If you notice a yellow or brownish hue that wasn't there before, that’s a red flag for oxidation or degradation. Likewise, if the solution stays persistently cloudy or you see odd floaters even after trying the tricks above, something is definitely off.
When this happens, the only right answer is to discard the sample. It's painful, but pushing forward with a compromised peptide will only jeopardize your results and waste more time and resources down the line. Start fresh with a new vial and meticulously review every step of your process, from your aseptic technique to your solvent choice.
Answering Your Questions About Reconstituting Peptides
When you're working with peptides, a few questions always seem to pop up. Getting these details right is crucial—it protects your research materials and ensures your experimental data is solid.
Even if you follow a protocol to the letter, understanding why you're doing something builds intuition in the lab. It helps you troubleshoot and make smart judgment calls. Let’s clear up some of the most common points of confusion.
What's the Real Difference Between Bacteriostatic and Sterile Water?
This is probably the number one question I hear, and the distinction is simple but incredibly important for your work.
Sterile water is exactly what it sounds like: purified water that has been sterilized to remove any microorganisms. It's great for single-use applications where you'll use the entire solution immediately. The catch is that once you puncture the vial, it has no defense against new bacteria.
Bacteriostatic water, however, is sterile water with a key addition: 0.9% benzyl alcohol. This tiny amount acts as a preservative, stopping bacteria from growing. For any peptide you plan to draw from multiple times, this is the only way to go. It keeps your solution stable and safe for up to 28 days in the fridge.
Why Is Shaking the Vial Such a Bad Idea?
It’s completely natural to want to shake a vial to get a powder to dissolve faster, but with peptides, this is a disastrous mistake. Peptides aren't tough, simple molecules; they are complex, delicate chains of amino acids linked by fragile bonds.
Shaking introduces a ton of mechanical stress. The shear forces are strong enough to literally tear these bonds apart, causing the peptide to denature (unfold) or clump together into useless aggregates. This kind of damage is permanent, and it will kill the activity of your expensive research compound.
Pro Tip: Gentle is the name of the game. The best way to mix is to slowly roll the vial between your palms or give it a few light, lazy swirls. A little patience at this stage pays off by preserving the peptide’s potency.
How Can I Tell if My Peptide Solution Has Gone Bad?
A properly dissolved peptide solution should look just like water: completely clear. If you see anything else, it’s a big red flag that something is wrong.
Keep an eye out for these tell-tale signs of trouble:
- Cloudy or Hazy Appearance: If the solution looks milky and doesn't clear up after a reasonable amount of time, you likely have a solubility or aggregation problem.
- Visible Specks or Floaters: Any solid particles, no matter how small, mean your solution is contaminated or the peptide has degraded.
- Change in Color: If your clear solution starts to turn yellow or brown, it’s a classic sign of oxidation or chemical breakdown.
If you notice any of these issues, your best bet is to discard the vial. Pushing forward with a compromised peptide will only give you unreliable results and waste your time and resources down the line.
For researchers who demand the highest standards, Bullit Peptides provides meticulously synthesized compounds that are third-party tested for purity and quality. Build your experiments on a foundation of reliability. You can explore our full catalog for your research needs at https://bullitpeptides.com.
Article created using Outrank